Hey everyone, hope you are having an amazing day today. Today, we’re going to make a distinctive dish, nick’s bacon cheeseburger sliders. It is one of my favorites food recipes. For mine, I will make it a bit unique. This is gonna smell and look delicious.
Nick’s Bacon Cheeseburger Sliders is one of the most favored of recent trending meals on earth. It is enjoyed by millions daily. It’s simple, it is fast, it tastes yummy. They are fine and they look wonderful. Nick’s Bacon Cheeseburger Sliders is something which I’ve loved my entire life.
Try this bacon cheeseburger slider recipe from Cabot tonight and let us know what you think! For instance, these bacon cheeseburger sliders pack a whole mess of flavor, and they're almost bite-sized! These easy-to-make stuffed biscuit sliders packed with your favorite cheeseburger ingredients are a genius way to serve a crowd without spending a lot of time in the kitchen.
To get started with this particular recipe, we must prepare a few components. You can have nick’s bacon cheeseburger sliders using 7 ingredients and 7 steps. Here is how you can achieve that.
The ingredients needed to make Nick’s Bacon Cheeseburger Sliders:
- Make ready 2 packs (17 oz.) Hawaiian rolls
- Prepare 4 cups shredded cheddar cheese
- Take 2 lbs hamburger meat
- Take 1 can (14.5 oz.) diced tomatoes with garlic and onion (drained)
- Get 24 bacon strips
- Take 1 cup butter
- Prepare 1/4 cup brown sugar
Slice into individual sliders, then serve. This Cheeseburger Sliders recipe is fun to make and even more fun to eat. The time saving recipe skips the forming of individual. When the patties are done in the middle, place them on the base of the halved buns.
Instructions to make Nick’s Bacon Cheeseburger Sliders:
- Grab a pan, toss it on the stove, set the burner to medium heat. Throw the hamburger meat in the pan.
- Set oven to 350, precisely. Cut the glorious Hawaiian Rolls in half so you have a top and bottom bun. Lay the bottom of your Hawaiian Rolls into a large dish. Layer with 2 cups of cheese. Place in the oven for 3 minutes to let the cheese melt onto the buns… My picture shows the cheese a little too done. Dang.
- Prepare your bacon. I usually get microwaveable bacon because I guess I’m just disgusting but I got regular bacon for you guys. So either microwave the bacon or throw it on a cookie sheet and let it get crispy in the oven. Microwaving is faster.
- The hamburger meat, bacon, and bottom bun layer should be done. Drain the diced tomatoes and then add to the hamburger meat. Go ahead and sprinkle the meat and with some salt and pepper.
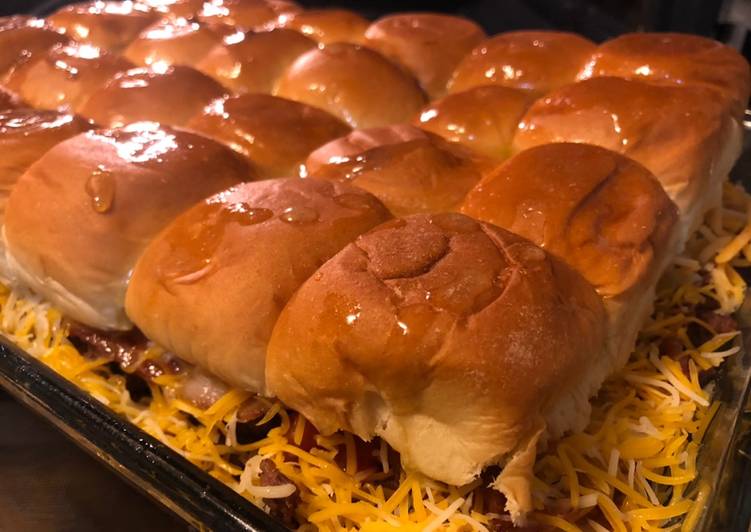
- Layer your sliders. Add the hamburger meat, then the bacon, next the rest of the cheese, and lastly the top buns.
- Add your butter and brown sugar to a bowl. Microwave it until the butter is melted. 23 seconds? Mix the two beautiful ingredients together and then glaze your buns.
- Bake at 350 for 20 minutes. The top of the buns should look golden and crispy and delicious. Take it out, let it cool, and dig in!
I enjoy these cheeseburger sliders on a soft bun like Hawaiian rolls or soft dinner rolls. Still, my husband and teenage boys love these No matter what small roll you use, these cheeseburger sliders will make everyone want another one or two or maybe three. Fifth Step: Stack The Meat On. Anyway, this the same general sandwich—grilled chicken, chewy bacon, and gooey cheese—but in precious little slider form for precious little slider-friendly occasions such as, oh…I don't know…the SUPER BOWL? The ultimate bacon cheeseburger with beef cooked in bacon fat, a bacon fat mayonnaise, onions caramelized in bacon fat, buns toasted in bacon fat, and a crisp bacon weave topping.
So that’s going to wrap it up with this special food nick’s bacon cheeseburger sliders recipe. Thank you very much for your time. I’m confident that you will make this at home. There is gonna be more interesting food at home recipes coming up. Don’t forget to bookmark this page on your browser, and share it to your family, friends and colleague. Thanks again for reading. Go on get cooking!