Hello everybody, I hope you are having an incredible day today. Today, I will show you a way to prepare a special dish, homemade cherry ice cream. It is one of my favorites food recipes. For mine, I am going to make it a bit tasty. This is gonna smell and look delicious.
I requested an ice cream maker for Father's Day and now I'm just experimenting - much to the delight of my family. This cherry ice cream went down very well - the balsamic vinegar is the secret ingredient. View top rated Homemade cherry ice cream recipes with ratings and reviews.
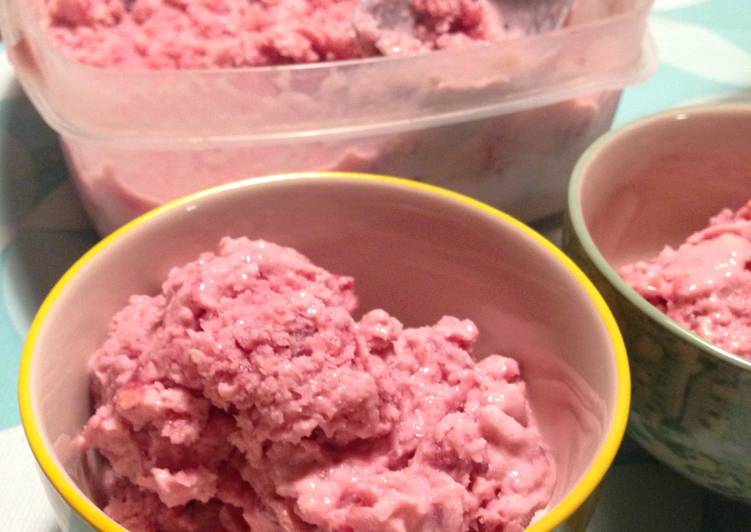
Homemade Cherry Ice Cream is one of the most favored of recent trending meals in the world. It’s simple, it’s quick, it tastes delicious. It’s enjoyed by millions every day. They’re nice and they look fantastic. Homemade Cherry Ice Cream is something that I’ve loved my entire life.
To get started with this recipe, we must prepare a few ingredients. You can cook homemade cherry ice cream using 8 ingredients and 11 steps. Here is how you cook it.
The ingredients needed to make Homemade Cherry Ice Cream:
- Make ready Cherries:
- Take 40 g sugar
- Get 600 g cherries
- Take Base:
- Get 400 ml whipping cream - 30% fat (or use half milk, half cream)
- Make ready 100 g sugar
- Prepare 3 egg yolks
- Take 100 ml butter milk
Ice cream made with eggs will have a deliciously rich custard flavor. Is it OK to Use Raw Eggs in Homemade Ice Cream? This is a call you have Once the ice cream is nearing completion, open the lid and spoon the cherry syrup and diced cherries into the ice cream. Use a long spatula to distribute.
Steps to make Homemade Cherry Ice Cream:
- In a saucepan over medium heat, simmer pitted cherries with 40 g sugar until cherries are very soft, about 10 minutes.
- Purée in a food processor or blender, or mash with a potato masher for a rougher texture (that's what I did here)
- Heat cream and sugar in a small pot over medium-low until sugar is dissolved, 5-10 minutes.
- Meanwhile, whisk the egg yolks until creamy and lighter in color.
- Mix about 1/3 of the hot cream into the beaten egg yolks, whisking constantly.
- Pour the egg yolk mixture back into the pot with the rest of the cream.
- Heat on low, stirring frequently, until the mixture is thick enough coat the back of a spoon and it leaves a clear line when you run your finger through it.
- Strain and push the mixture through a fine sieve to get rid of the little curdles that formed when cooking
- Stir 80 ml buttermilk and the cherry purée into warm, strained base. Cool down and then chill in the refrigerator for a few hours or overnight.
- After chilled, put into a container and put in the freezer. (or user your ice cream maker here). Stir well every hour or two to help break up ice crystals. When it's the consistency you like, it's ready!
- If you freeze it for a long time, it will get hard. In that case, let it sit out on the counter for about 20-30 minutes, stirring around every few minutes, until it's creamier again.
This egg-free homemade cherry ice cream utilizes frozen cherries and a creamy almond-spiked base for a summer ice cream where all the best flavors I have another recipe for Cherry Chocolate Ice Cream that was one of the very first ice cream recipes I ever posted on Our Best Bites. Homemade cherry ice cream made with fresh, sweet cherries, milk, cream, sugar, with shaved bittersweet chocolate folded in. To make cherry ice cream, you do have to pit some cherries. This homemade Cherry Vanilla Ice Cream made with fresh cherries, Madagascar vanilla, heavy cream, milk and sugar is super creamy and refreshing. Ever since I got an Ice Cream Maker, my family has been spoiled rotten.
So that is going to wrap this up for this special food homemade cherry ice cream recipe. Thank you very much for your time. I am sure that you can make this at home. There is gonna be interesting food at home recipes coming up. Remember to bookmark this page on your browser, and share it to your family, colleague and friends. Thanks again for reading. Go on get cooking!